
I took a little over ten minutes a couple of weeks ago to made a quick video of the garden. It’s amazing how much it has changed already in that two weeks! We’ve gotten a few tomatoes and the first several cucumbers by now, and the zucchinis are coming out our ears. I was thankful that ladies at church were happy to help us out with that problem today.
Homemaking
When the Washer Explodes…
…we must get a new one. Nine years and one month ago, I bought a 10 kg LG washing machine. While it was still under warranty, both pumps went out, at different times, and were replaced. Otherwise, the only problem I’ve ever had with it (besides the filter needing to be cleaned) was that occasionally it would refuse to turn on till I pushed the power button 20-30 times. It was getting louder and louder, though, and four days before we flew to the United States, I was outside hanging up laundry while my second load finished spinning out. Suddenly I heard a terrific crashing, banging noise, and then silence, other than the washer giving its error code signal. I went inside to find this:


Several sides were dented out,

and a hole had been punched in the wall.

I went to town that afternoon to look for another washer. I knew I wanted a 10 kg one, and I wanted direct drive rather than belt drive. There are three shops in Greymouth that might have what I wanted, within easy walking distance, so I parked behind the one I reckoned I would end up buying from, and walked to the farthest place first. The only large washer they had was a cheap Chinese brand. The salesman really talked it up, but I wasn’t confident, from what he said, that it would hold up to our kind of use, so I asked about the drive. It took most of half an hour to find the information, but he finally worked out that it was belt drive. I thanked him for the information, and said I would keep it in mind.
I had taken Miss Joy with me, and as we walked to the next shop, I prayed that God would make it clear which washer I should get. Well, the second shop, which is the most expensive of the three, didn’t have anything larger than 8 kg. On to the last, which is where I was expecting to find something near what I wanted. They had one 10 kg washer, a name brand. I asked about the drive. The lady (a neighbor of ours, as it turns out!) looked it up and found that it is direct drive. I asked the price, bracing myself to hear that it was $2,000-2,500. She replied, “$1,500, down from $2,399.” I said, “I’ll take it.” The only one of these they had left was the floor model, so I took that home with me. We installed it that afternoon, marvelling at God’s provision, and within two days it had washed six loads of laundry–quietly.
Oh, and the fun part of the day? I stopped to fuel up the ute I was driving, which was Simon’s. (He didn’t have any idea I borrowed it to go to town.) While I was filling up, a car pulled in behind me. I glanced at the driver, registered that it was a handsome, clean-cut young man in a plaid button-up shirt–and then did a double-take. It was Simon! He works about half an hour from town, but had a meeting he needed to go to that afternoon. It’s special to bump into a son when I’m in town.

Meat!
We did a lot of butchering in June. The first weekend, while more than half the family were in Dunedin, a neighbor gave us a deer. Those of us who were at home got it boned out and minced, and then I made it all into hamburger patties.

A couple of weeks later, Simon killed a deer, and we made that one into mince, and froze it for later use.

We also got some nice pieces of backstrap from it.

The last weekend of the month we killed a beef heifer we raised for almost two years. She was the biggest beast we’ve ever processed ourselves, and when we weighed all the packages of meat while we were putting them in the freezer, we calculated that the hanging weight would have been about 275 kg (over 600 pounds). This was the quarters hanging in the carport, where they stayed for two days before we broke them down.

We made everything possible into roasts and steaks, and turned the trim into sausages.


The kitchen was a very busy, messy place that evening!

A few days later, I cut up the steaks, which we had put in the fridge in big bags, and the children helped to get them wrapped.

After a month, my hand has finally recovered from all that knife work!
Meat
Do you sense a theme here? Milk last week, meat this week. Hmm. What does my life revolve around? It couldn’t be feeding a lot of hungry people, could it?
We’ve processed two cows in the past month. One was an old dairy cow that we boned out and ground up because she was too tough for much else. The other was a 1 1/2-year-old steer that we raised. He was on the small side for eating, but because of his bad habit of jumping fences, we decided that he had better jump into the freezer before he caused any more trouble with neighbors. We have a lot of meat in the freezer! I thought I’d share a few pictures of some of the things we did with all that meat.
First, here is a picture of Simon running it through the mincer. We normally use that table for school in the mornings, but the days that we were working on meat, we set up a table in the living room and used that, instead.


I made a lot of the meat into meatloaf. I packed it into plastic-wrap lined loaf pans, froze it, then popped it out and put two loaves into each ziploc bag in the freezer. We’ve already had a couple of easy meals from that.

Another lot of meat got shaped into hamburger patties and frozen, then put into bags, free-flow. I put plastic wrap between each two layers of patties on the cookie sheet, and stacked them up about four layers high. It wasn’t too hard to pop them apart with a butter knife to transfer to a bag when they were frozen.

I also saved out a lot that day to make into meatballs the next day, which are also in the freezer. I guess we forgot to get a picture of them!

Another lot of meat I cooked up right away and froze that way. It sure is handy to pull out a package of frozen, cooked hamburger and throw it into my soup or whatever! I liked it so well after doing the first cow that I cooked up a lot more from the second one. I was also going to can a lot of it, but I got sick and spent the day in bed, instead, so Esther just divided the meat up and froze it raw.


We saved all the bones, too. We cut them into smaller pieces with a power saw, and divided them into bags according to the amount that will fit into my biggest pot. I fill the pot with water and add some vinegar, then simmer for a day or two. Then, I pressure can it and we have the beginnings of instant soup or gravy!


We got all these bones from the old cow! I didn’t make it through all of them before it was time to do the steer, but had friends who were happy to take some.

One of the evenings we were working on meat, I didn’t have much time to cook but needed a nourishing meal quickly. I opened these jars–beans, stew beef, and broth–and made a quick, delicious stew.

Then end product: I had some black beans in the fridge, and added a package of pasta. We enjoyed it that evening, and there was enough left for men’s lunches the next day or two.

Milk!
We are milking two cows this year, and right now we’re getting about 20 liters (5 gallons) a day. Poppy, our older cow, gives about 12 liters a day, and Bluebell, the younger one on her first lactation, is giving about 8 liters. Bluebell gives A2A2 milk, so we primarily use her milk for drinking, kefir and cooking, since Gayle does all right with that kind of milk. Poppy’s milk is A1A2, so that’s what we give to friends who need it, and turn the excess into cheese. In the summer, I used a lot of it to fertilize the garden or as a spray to try to ward off powdery mildew (I still don’t know if it works). I was thankful for friends who needed a lot of milk for the last few months, but now their cow is giving them plenty of milk, so I have a lot to deal with again! Yesterday morning I decided to make a lot of cheese, to clean the fridge out for the weekend. This is what I started with:

The big pot, 20 liters (5 gallons), was mostly cold milk from the fridge. I turned that into a block of hard cheese. The pot to the left is about a gallon (5 liters), which I made into feta. The pot to the right is six liters (a gallon and a half) which I turned into mozzarella.
I started with the hard cheese, since that takes about four hours of on again/off again work to get it into the press. This is what I end up with a day later; it’s a type of Colby. Because I use raw milk, and don’t have a climate-controlled area in which to produce and store it, it varies quite a lot in texture and flavor, but is always delicious. I keep the cheeses in the kitchen on a mat for a week or two, flipping them frequently until they develop a rind. Lately, with the chilly, damp fall weather we’ve been having, I have had a problem with mold growing on the outsides, so I’ve been rubbing salt into them to help the rind grow without mold; when mold does grow, we rub them with vinegar to slow that growth down. Usually, the cheeses develop a nice hard rind within two weeks, and then I move them to an old fridge where they keep, without any wrapping, till we use them. Some that we have out there right now are four months old, with quite a sharp flavor.

These are the cheeses I made over the past couple of weeks. The oldest is the back one on the left; the front right one is only a couple of days old.

After the curds are out of the whey, I bring the whey to a boil to extract the rest of the protein. During the growing season, we just take the whey out to the garden and feed it to the tomatoes, but there isn’t anything out there right now that needs it. We can’t eat very much ricotta, since most of it is made from Poppy’s milk and Gayle can’t have it, so we feed it to the chickens. It’s a good source of protein for them! I bring the whey to a boil, stir in a little vinegar, then drain it through a cloth and hang it up overnight to finish dripping.


When I was about halfway through making the hard cheese, I started the mozzarella. A few years ago, I came across a recipe that gets around using citric acid. Instead, use a mesophilic starter to acidify the milk. The proportions given were 1 quart of starter to 3 quarts of fresh milk (I doubled that this time), and I’ve found that works very well with the Caspian Sea yogurt I use for starter for everything I make. Kefir would likely work just as well. The recipe says (and I actually followed it this time!) to mix the starter with the milk, heat it to about 90ºF, hold for half an hour, then stir in half a teaspoon liquid rennet diluted with water. When it coagulates, cut the curd, then stir gently while heating slowly to about 100-105ºF. Strain through a cloth, let hang to drain for about 20 minutes (I think I went about an hour or an hour and a half this time). Reserve a quart or two of whey for a brine. Heat some water in a pot to about 150ºF, slice the curd into roughly 1/2-3/4 inch slices and cut into chunks about 2-3 inches square. Put a chunk of curd into the hot water till it’s soft, then stretch and form into a ball. If it is just the right acidity, it will stretch beautifully and form a smooth, shiny ball. If it’s not acidic enough, or too much, it won’t work. This time happened to be perfect–I’ve had a lot of failures, though! Drop each ball into cold water, or if you want a block of mozzarella, use larger chunks and drop them into a container to melt together and form a brick of cheese. If making balls, when finished, cover them with a brine made of a quart of the reserved whey and a teaspoon of salt. These balls rarely last more than a day or two around here; the children love them!


The smallest lot of milk turned into feta. This is the easiest cheese to make! I take milk still warm from the cow, put it into a pot, and stir in maybe 1/4-1/2 cup of starter. The Caspian Sea yogurt works great; kefir would, too. Stir in 4-5 drops of liquid rennet diluted in water (for 4-5 quarts/liters of milk). Cover and let sit on the counter top all day. In the evening, ladle out into molds (or a cloth-lined colander). I have several ricotta/feta molds, and they are wonderful for that. Let drain overnight. In the morning, unmold and sprinkle all over with salt. Turn once or twice through the day and sprinkle with more salt. Eat any time. As you see here, someone had a sample an hour or two after I took them out of the molds this morning. I rarely bother to refrigerate this cheese, since it stays nice on a plate on the table for 3-4 days and is gone by then anyway.

So, there is my day yesterday, in cheese. I also made butter, but forgot to get any pictures of it before it was finished and in the freezer. In one picture, you can see the cream warming up. I got it out of the fridge the night before and mixed some started (the Caspian Sea yogurt again) into each jar. Halfway through the afternoon I made the butter. I have discovered that my Bosch mixer, with the whisks, works great to make butter. Depending on the temperature of the cream and the cows’ diet, it takes anywhere from five minutes to half an hour to make a batch of butter. I can put about 3 quarts of cream in my 6-quart mixer at a time. From about 9 quarts of cream, I got around 4-5 pounds of butter. Because the cream has been cultured before churning, the butter can stay at room temperature for a couple of weeks without going rancid, as long as I work all the buttermilk out of it and salt it properly.
We are thankful to be able to have our cows! It does get to feeling like a lot of work sometimes, but I’m grateful to be able to feed my family such good food.
February/March 2023 Photos
Barring our trip to Karamea, detailed in the last several posts, I haven’t taken many pictures this year! I’ve been living life, not documenting it. Here are the ones I have from the last couple of months, though.
The last time I went to the States, four years ago, Mom gave me a quilt top that my sister had pieced, from blocks I cut out of a lot of fabric scraps before we moved to New Zealand, over 13 years ago. I put the quilt top in a closet and basically forgot about it because I didn’t know what I was doing with it. After she got through all the other sewing projects we had on hand, Mom still wanted something to do, so we figured out what to do with this quilt top. We found an old sheet for the back and a couple of flannel sheets for the middle, and she tied it together for a comforter. The next problem was to find a place to do the work. Our house is too small to lay it out on a floor, so she took it outside! The ground was dry, so it worked. It was amusing, though, to see a quilt laid out on the grass.

We found a playground in Karamea, and Miss Joy and Little Miss played on it for a little while one afternoon. This little girl is infatuated with playgrounds!

We arrived home from Karamea on a Friday, and spent the entire next day working through the ripe produce that had accumulated in the garden while we were away. This was over 250 pounds of tomatoes, and the green pile in the living room was cucumbers. As you can see, we ran out of room on the table for the washed tomatoes and had to make piles in the living room, too! We are very thankful to have a lot of jars of tomatoes to use over the winter.

The little girls love to dress up. I love how Little Miss sometimes reads to Miss Joy, who obviously loves that, too.

James is helping to build a house behind us, on the edge of the hill on which our village is situated. We took a field trip one morning to watch them pour the pad for it. How do you like the view? The mountains you can see are the Paparoa Range, between us and the Tasman Sea.


Just before Mom left, the children decided they needed to make Chocolate Cream Doughnuts, after we read a book in which the main character built up a business making them. I had the stove covered with pots that day, as I was canning, so they used a camp stove on the table to do the deep frying.


The children liked helping us peel tomatoes when we canned them this summer. What a mess they made of themselves, but we appreciated their help!

On the way home from taking Mom to the airport, we bought a budgie. Kea now lives with Jo-Jo in his cage, and they are very happy together. We started out with them in separate cages, but the birds soon let us know they wanted to be together. The funny thing is that Jo-Jo has put on so much weight since he has company that he can hardly fly now! We’re trying to force him to fly every day, hoping to slim him down a little. Kea flies very well. We can hold Jo-Jo, but Kea won’t let us touch her. She readily goes back into the cage after a fly, though.

Simon was feeling enough better by March that he looked for things to do outside. Obviously, the children benefited from this!

One Saturday morning, we started seeing vintage cars cruising around the village. Mr. Imagination took my camera and went out to take pictures of a lot of them. It was a rally that went around the various villages in the Grey Valley.


Pork!
A few weeks ago, a friend called us to say that someone had a lot of wild pigs that had been killed in a competition, and they were available for anyone who came to get them. Elijah drove the 15 minutes to pick up three for us and two for another friend. We won’t turn down free meat! We got ours skinned that night.

The next day, Esther and I spent the morning boning them out. Wild pork has a rather gamy flavor, so I wanted to make most of the meat into sausage. We saved two legs for ham, and threw away one entire pig because it smelled so strong we couldn’t stand it. We ended up with 70 pounds of meat to make into sausage! She put it through the mincer, and then we weighed the meat and mixed in the seasonings. Then, she put it through the mincer again.

After Gayle and Elijah got home, we stuffed the sausage into casings.

Miss Joy had a great time helping to package the sausages!

Now, we’re enjoying (only slightly gamy) delicious pork sausages!
Tomatoes
It’s that time of year when we start all the tomato plants we need for the upcoming summer! This year, Esther wanted to help, so she could learn how I do it; most years, I do all of this project by myself. Late in August, we put the seeds into the soil.

We put the tray of seeds in the greenhouse under a second layer of plastic until they germinated. Esther cleaned out that corner of the greenhouse. There are several tomato plants there that she transplanted in there from the garden, where they started growing late in the summer. We had kept an extra layer of plastic over them all winter, and they lived, although, with low light levels for a few months, they didn’t thrive. One has a green tomato on it, though!

About a week or a week and a half later, the tiny seedlings were ready to prick out and transplant into individual punnets. It was a beautiful day, so we sat at the picnic table to do this job.


I took this picture on the 25th of September, about a month after we initially planted the seeds. The plants had been in our hothouse, a frame covered with greenhouse plastic on our back step, which faces the sun.

Today, the 29th of September, five weeks after starting the seeds, I decided it was time to transplant the little tomatoes into bigger pots. Little Miss helped with this job; she loves writing the labels! We didn’t get the entire job done, but did about a fourth of them, choosing the largest plants to start with. Now, they get to live and grow in the big greenhouse until time to plant them in the garden.

Fresh Salsa
This post, like the last one, has to do with food. However, this food is much less controversial!
This time of year, our garden is overrun with tomatillos. These unique fruits look like small, green tomatoes, and grow in papery husks. They readily self-seed all over the garden, wherever they drop and don’t get picked up. In Michigan, I had a lot of trouble with worms getting inside them and ruining them, but that doesn’t happen here. I really like food that grows itself without my input! This spring, I wanted them in a particular area, so I dug up seedlings where they grew by themselves, potted them, and when they had roots established, planted them in the section designated for them. Then, I thinned the ones that were growing in other parts of the garden, so there would be only one in a space instead of two dozen. Now, I harvest them while I harvest zucchini or cucumbers or green beans. They often fall off the plant when they are ripe; I also harvest them green sometimes when they are big enough to burst their husk.

The problem is, what to do with all this bounty? We put them in the salsa we make to can every year, using about half tomatillos and half tomatoes. We were done with that a month ago, however, and now the main crop of tomatillos is ready! I made salsa verde last year, but most of it is still on the shelf. Our favorite way to use them is by making fresh salsa. I made a batch a couple of days ago and took a picture to show you this deliciousness.
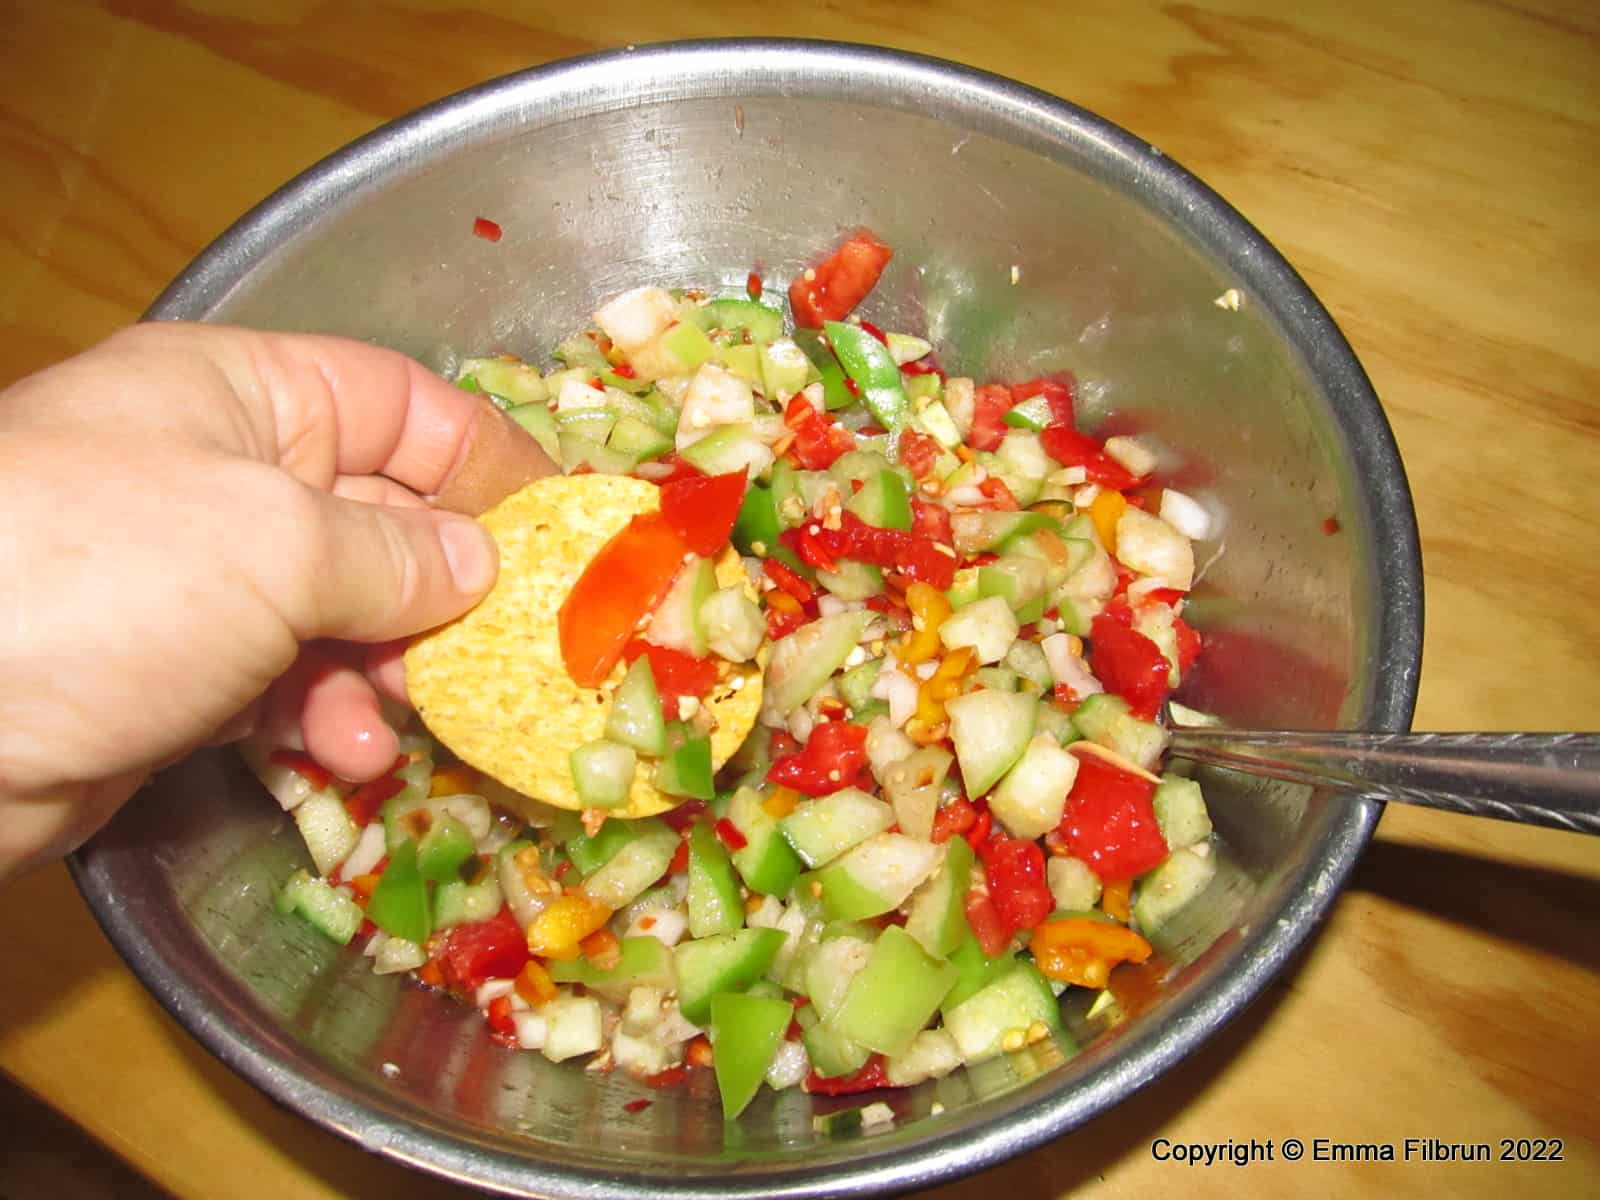
I have no idea how much of most ingredients I used. That’s a two-quart bowl, and I filled it over half full with chopped tomatillos. Then, I added three or four chopped tomatoes. The proportions really don’t matter; we’re short on tomatoes now, so I used extra tomatillos. I don’t have a lot of bell peppers, either, so I used one, I think, but you can use two or three. I also put in half an onion (red is best, but I don’t have them this year), and about four minced cloves of garlic. Also, add maybe half a teaspoon of salt, several shakes of pepper, and a quarter cup or so of cider vinegar. The tricky part is the amount of chili. My chili peppers didn’t do well this year, but my neighbor, who moved away and let me take over her garden, has two plants that are loaded. One of them is consistently very very spicy, and the other is sometimes spicy and sometimes mild! I put in one finely diced chili from that second plant, then gingerly tasted the result. It wasn’t very spicy, so I added another. Wow! That took the heat level way up. So, use your own judgment as far as the amount of chilis or jalapenos you use. Dig in with corn chips and enjoy.
Finally!
Warning: If you have problems with hunting or eating meat, stop right here! There are details you may not want to read or see.
When Simon was about seven, and James was about three (maybe eight and four–I’m not sure), the two of them and a cousin who was in between their ages, who lived on our property, disappeared one afternoon in November. This was in Michigan, and in Michigan, the last two weeks of November are Deer Season. (Maybe that should be in all-caps; it is that important to a lot of people, and the first day is nearly a state holiday!) People who are not hunting stay out of the woods and near buildings during that time, lest there might be stray shots. It can be dangerous to be walking around in the woods or fields during that time. Anyway, these three children disappeared. When someone realized they were missing, both families started searching. By the time we had been looking for 45 minutes, my sister-in-law was about ready to call the police–and then they showed up. They had been out hunting deer behind the woods at the back corner of our 40 acres, over a quarter of a mile from the houses! They were armed with a baseball bat and a stick, and Simon apparently fully expected to bring down a deer. They were totally unafraid, with no idea of the danger that the adults knew about!
Ever since that time, Simon has dreamed of killing a deer. He would love to live off the land, with a hunter-gatherer type of lifestyle. He has gone on hunts with friends half a dozen times since we moved over here, and never saw a deer when anyone in the group had a gun that could bring one down. This week, he went hunting twice with a friend who moved to the area a few months ago and who, importantly, possesses a gun license and a deer rifle. They went out in the middle of the afternoon the second time and searched for likely places to see a deer. After several hours, an hour or so after dark, they gave up and started out, and finally got a possum for their pains. Then they continued on down the road–and saw a deer in the middle of the road! It took a couple of minutes for Simon’s friend to get his gun loaded again, and Simon kept the spotlight on the deer. The first shot only wounded it (they hadn’t realized the gun wasn’t sighted in properly), so Simon took off up the river, following it. He soon caught up and delivered the killing shot. Then, he got to pack it out of there to the car (probably a good thing he had so much adrenalin in his system–it was heavy!) Finally, his dream of bagging a deer came true.
Mr. Imagination was along, since I had gone to town that day, leaving him with Simon, and no one was home to keep track of him. He was over the moon to be a part of this experience.
I love the grin on Simon’s face! The second picture is the Daihatsu–the gutless car that is often scoffed at, but which can go almost anywhere.


Simon brought the deer home and hung it in our carport. The next evening, Little Miss helped him skin it, and then he and Gayle brought it into the kitchen where we boned it out. The friend he went with, and his wife, stopped in while we were working, and he was excited to see that part of the process. The next day, they came back, after we had minced all the meat, and helped turn some into sausage and package it all. We got 34 kg of mince and 5 kg of backstrap from that deer! (That’s about 86 pounds.) It was a young stag, so quite tender and tasty. We had venison sausage patties with breakfast, venison hamburger patties for lunch, and backstrap for dinner. The boys were delighted to get to eat all that meat! Now, Simon wants to go hunting even more.


Half of the bones are cooking in a big pot right now, to make bone broth, and the other half are in the freezer waiting. There was very little waste from this animal, something that makes me feel good about them killing it.